
Create your first zone
See where Skopos detects you, match the map to your room, and draw the area where you want to detect presence.
Firmware required: 1.2.0 or later. Update your Skopos v2 before using the Zone Editor.
Before you start: add Skopos to Home Assistant and mount it in its final position. Use a phone or computer on the same local network. Open the Skopos device page in Home Assistant and click Visit to open the Zone Editor.
Open the Zone Editor
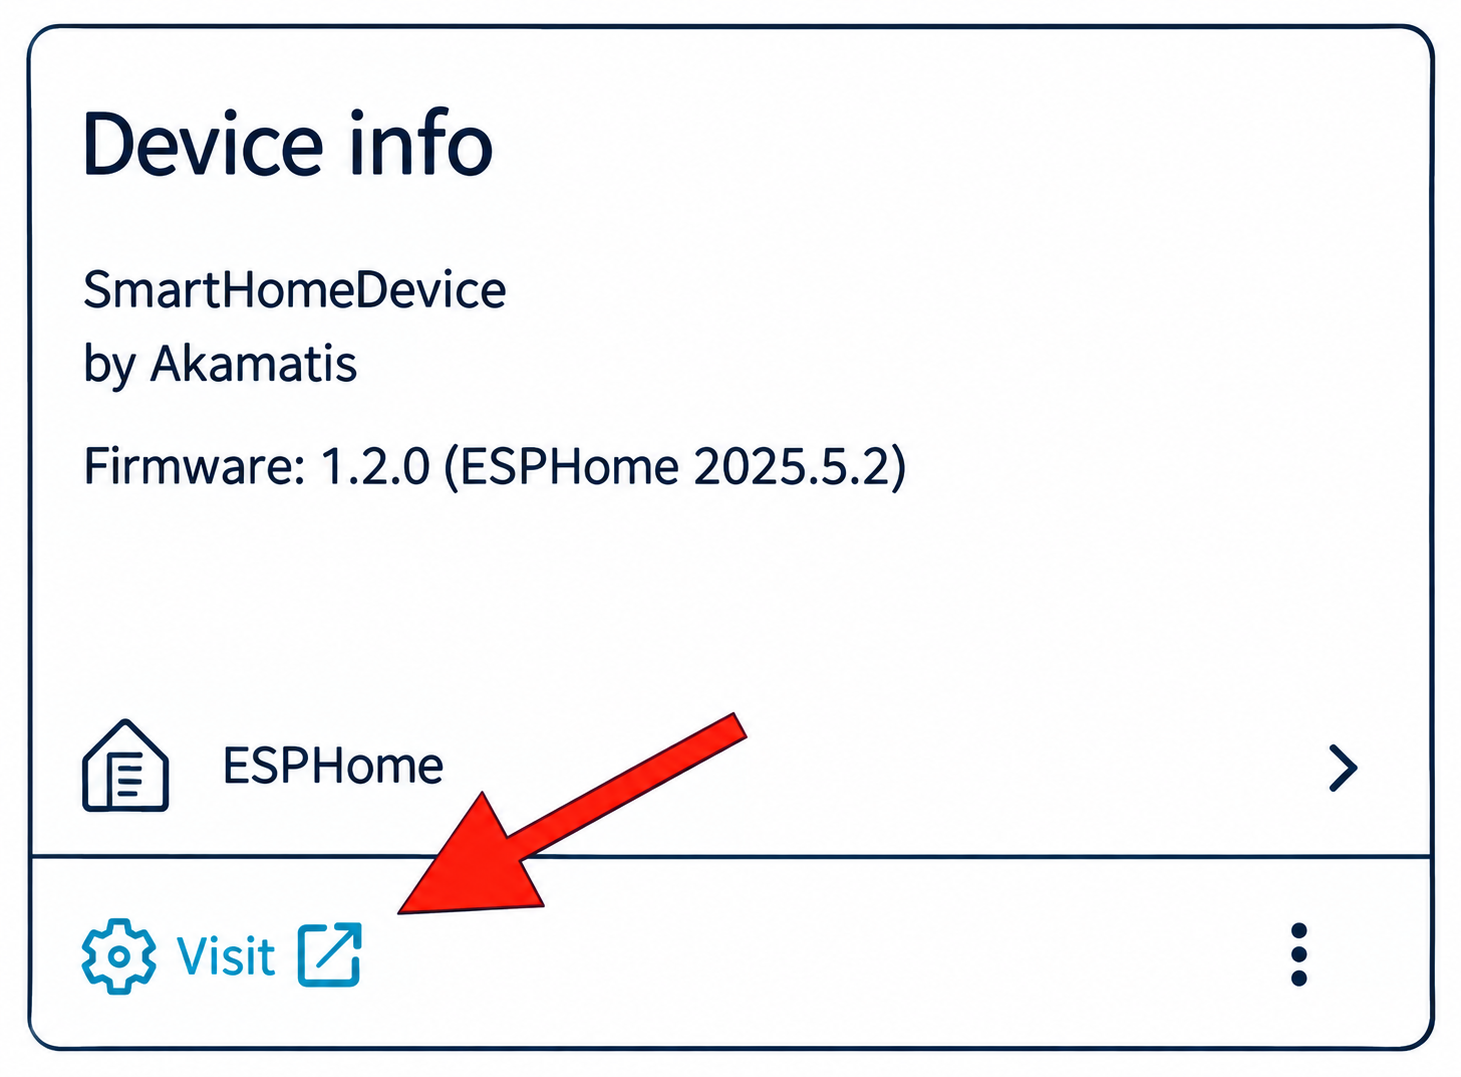
On your Skopos device page in Home Assistant, find the Device info card. Click Visit at the bottom-left corner to open the editor hosted on your Skopos.
Get to know the editor
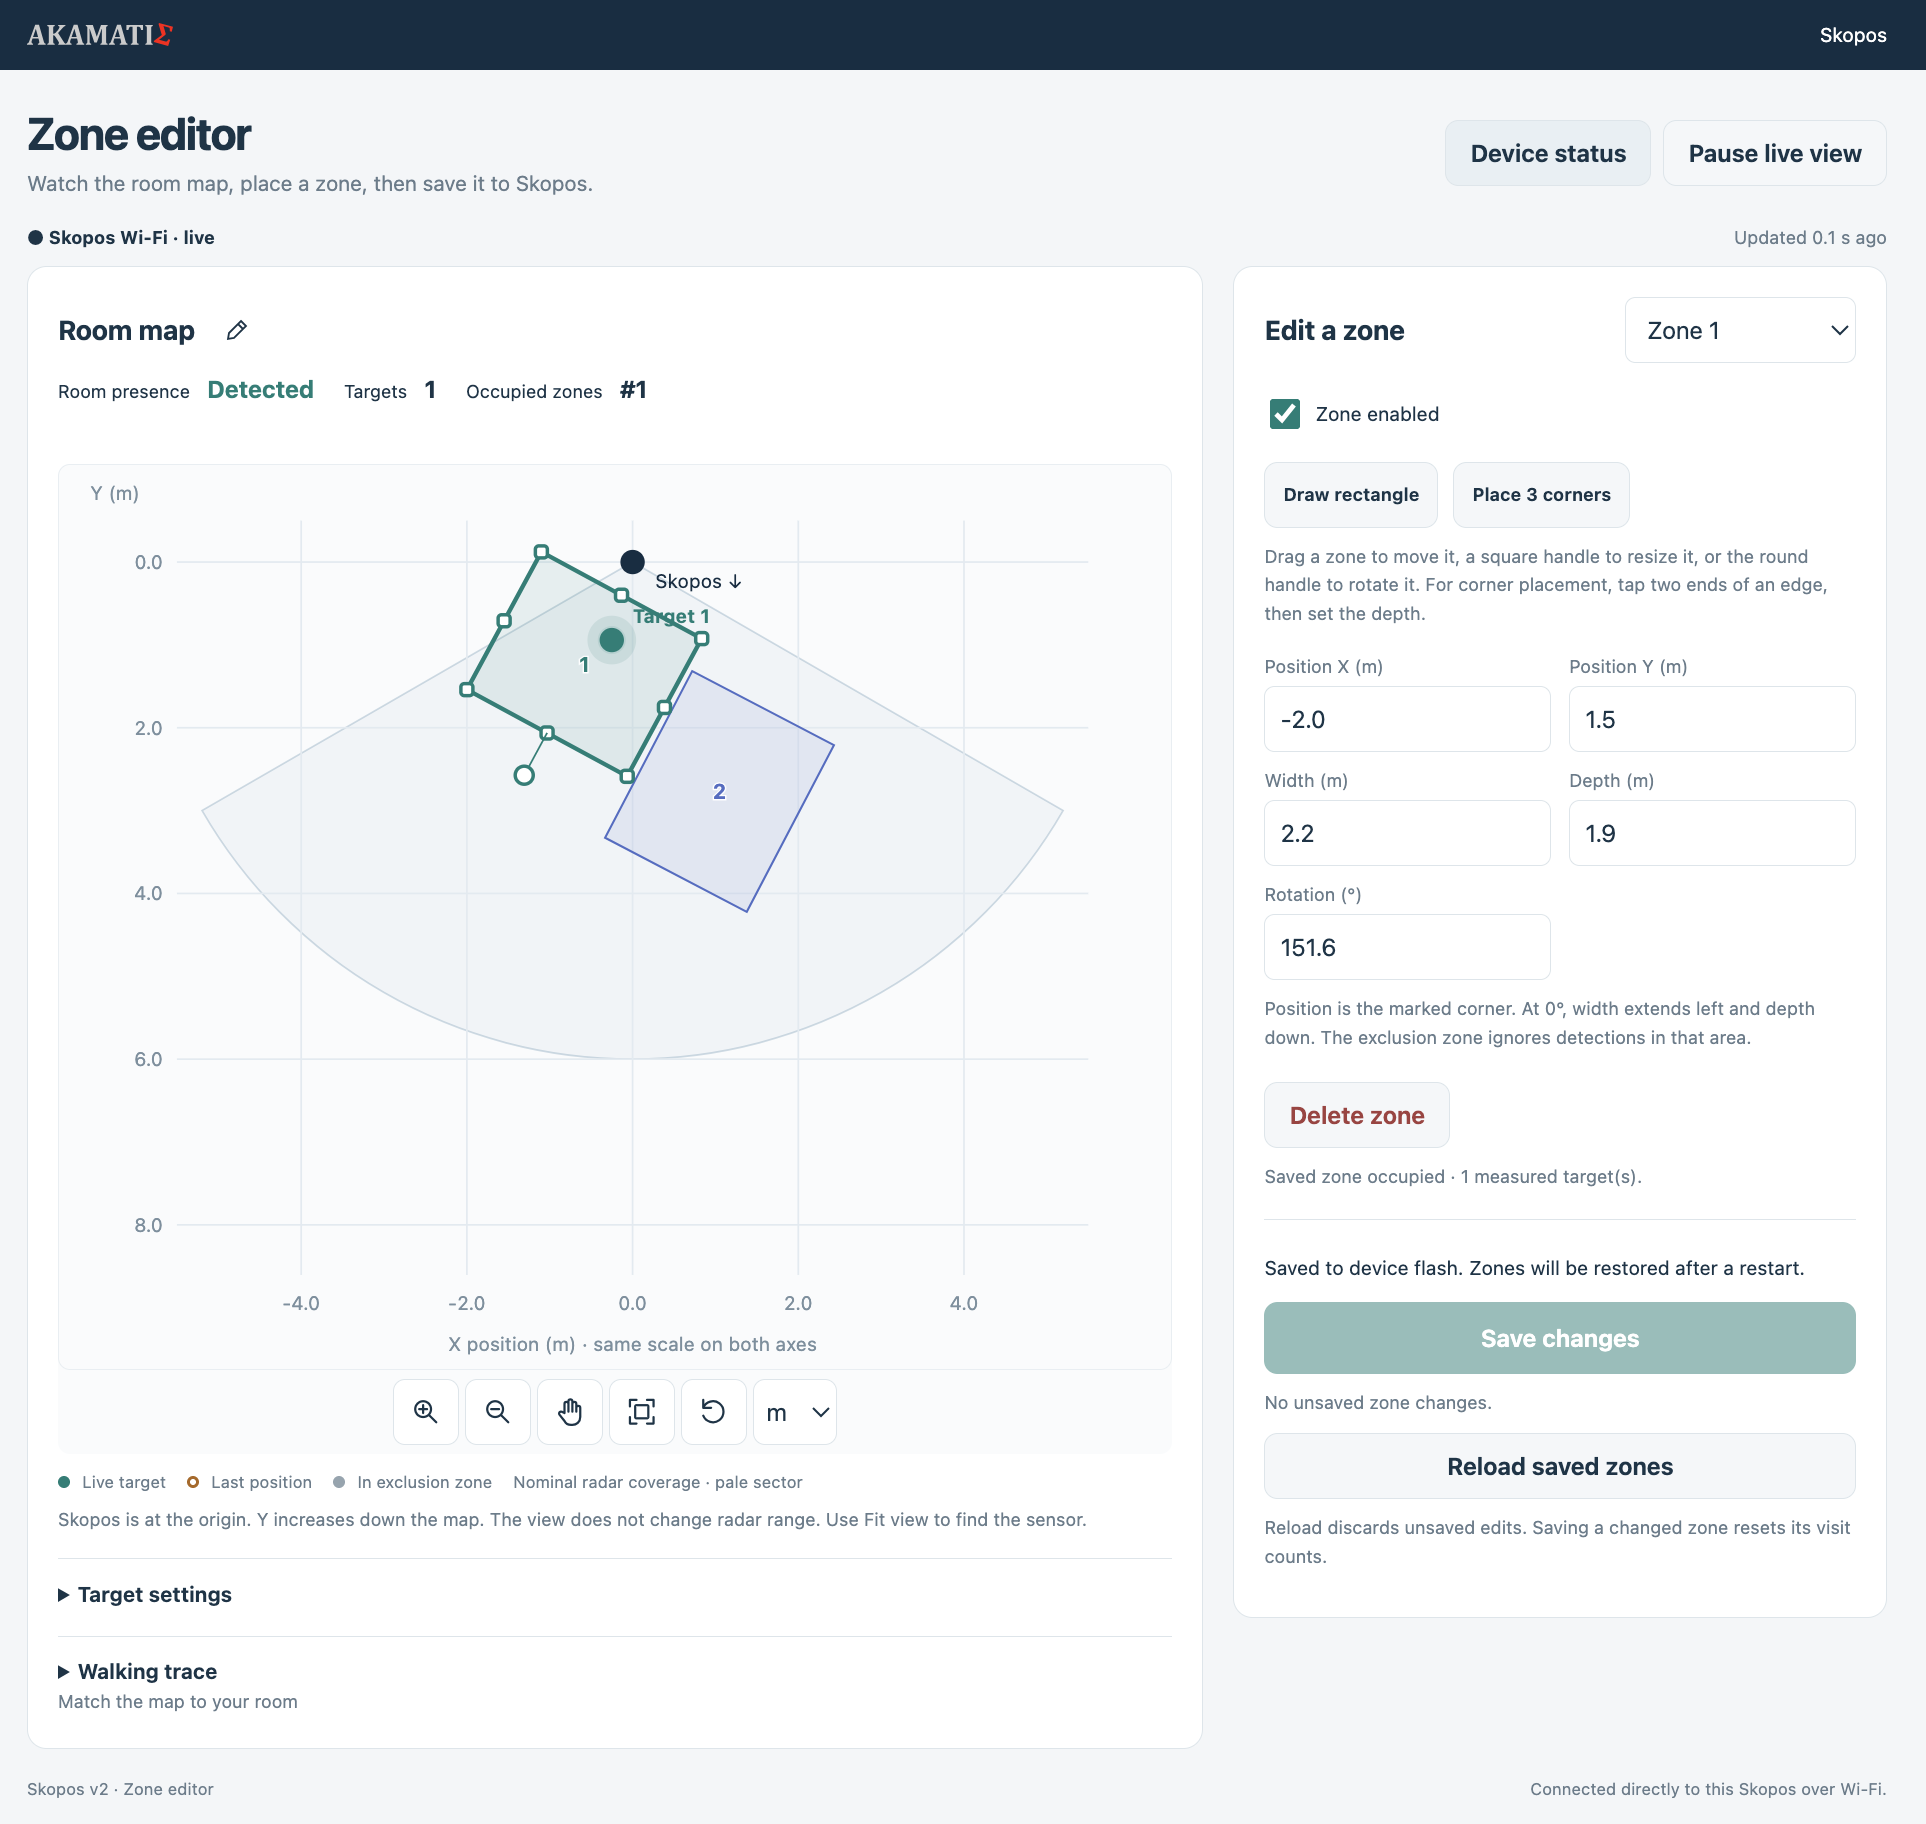
Select a numbered area to see what it does.
Draw, adjust, save
Find yourself
With live view connected, walk into the area you want to cover. Watch your target marker to locate that area on the map.
Choose Zone 1
In Edit a zone, select Zone 1 and make sure Zone enabled is checked.
Draw the area
Click Draw rectangle and drag across the map. Or use Place 3 corners: tap two ends of an edge, then set the depth with the third point.
Fine-tune it
Drag the zone to move it, a square handle to resize it, or the round handle to rotate it. You can also enter Position X, Position Y, Width, Depth and Rotation in the panel. Position refers to the marked corner.
Save and test
Click Save changes and wait for Saved to device flash. Walk into and out of the zone, then check Occupied zones: #1 and the corresponding presence entity in Home Assistant.
Changes take effect after saving. While you edit, the map shows your draft, but presence still uses the saved zones. The map’s floppy-disk icon also saves your changes.
Repeat for Zones 2 and 3. Use the exclusion zone for an area where detections should be ignored; it appears hatched with an × in the center.
Two tools to make setup easier
Open either section for a closer look at its controls.
Target settings
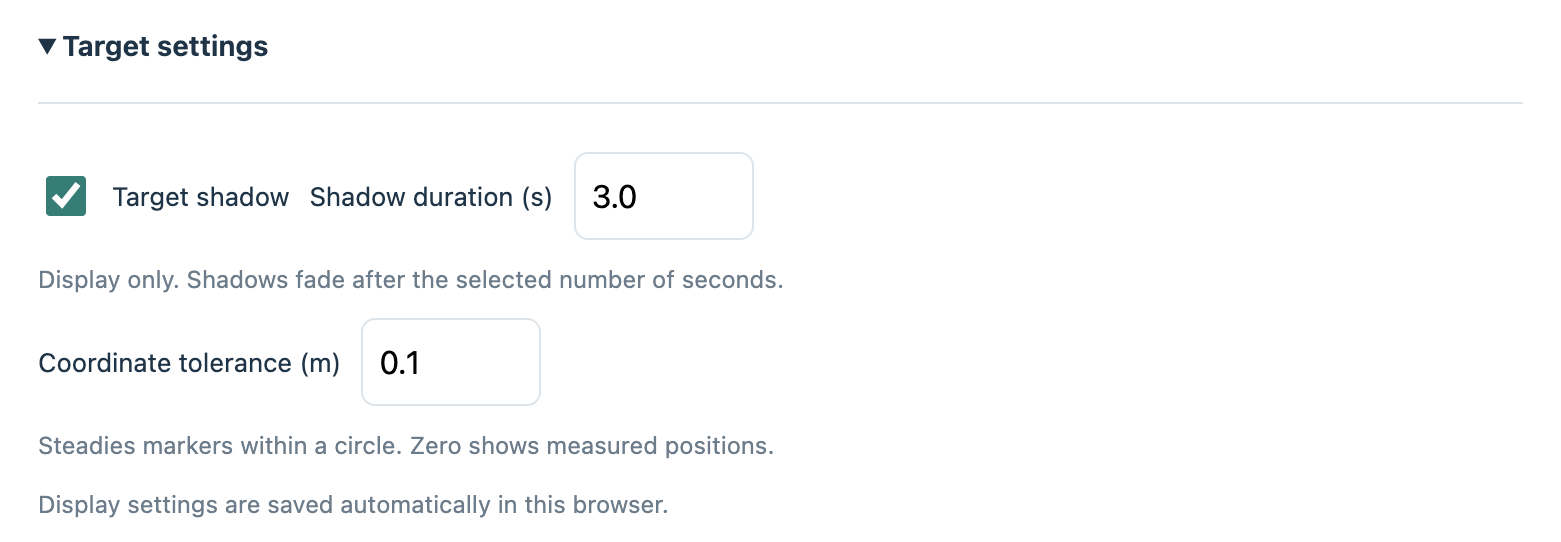
Expand Target settings below the map to adjust the display. These controls do not change measured positions, zone detection or how quickly Skopos reacts.
- Target shadow
- Adds a short, fading shadow behind a target so its recent movement is easier to follow.
- Shadow duration (s)
- Sets how long the shadow remains visible. The default is 3 seconds.
- Coordinate tolerance
- Steadies the displayed marker within a small circle. The default is 0.1 m. Set it to zero to display measured positions directly.
These preferences save automatically in this browser. They can be different on another phone or computer.
Walking trace
Use a recorded walk as a guide when you are unsure where a doorway, chair or room boundary sits on the map. The trace is a setup aid and does not change presence detection.

- Expand Walking trace and check Record my walk.
- Leave Follow on One person automatically when you are alone. If needed, choose the target you want to follow.
- Walk along the edges or corners of the area. Enable Show coordinates if you want position values on the map.
- Uncheck Record my walk to stop recording. Use the path to draw or adjust your zone, then save the zone.
Clear trace removes the recorded path. The trace stays only in the current page session.